Here I describe smaller or past projects specifically for my shop that I think are interesting, but not worth a full blog post.
Wall Cabinet Clamp Storage
Soon after I started my shop, I knew clamp storage was going to be a problem. I tried a few wall racks and mobile bases I found online, but none of them really suited me. Using my other cabinets (where doors are storage) as inspiration, I built this cabinet.

These are the doors. The back is a piece of 3/4″ plywood, with 1×8 material for the sides. The left side is lined with 3/4″ plywood cut at a 45° to make french cleats. These hold various custom built fixtures to hold a variety of bar, quick, spring, I-beam, and handscrew clamps. The right side is all fixed sized fixtures to hold Jet parallel clamps. I have the parallel clamps in 12″, 24″, 36″, 48″, and 60″ lengths. These handle most of my woodworking needs.


Inside the doors, I have more french cleats, with holders for a variety of less commonly used clamps. For pipe clamps, I thread both ends of the pipes, and keep couplers on the threads. This allows me to join multiple length together to make really long clamps.
Heavy Wood Bench
One day at Home Depot, I discovered a pile of 2×6 construction-grade lumber cut into 4′ lengths that had never been picked up. They were selling these in their scrap bin for approximately $0.25 per board. I purchased the entire lot and, after allowing the wood to dry for several months, planed the boards down and constructed this sturdy bench. Though it measures only about 22″ x 40″, the top is nearly 3″ thick. Remarkably, the bench contains no fasteners at all—it’s assembled entirely with glue and mortise and tenon joinery.

I have since drilled holes in the top for bench dogs and mounted a Wilton woodworking vise to one end.
Drill Press Cabinet
I needed storage for drill bits and accessories, so I utilized the often-wasted space beneath my drill press table by building a custom cabinet. The cabinet is sized to straddle the drill press base, fitting perfectly between the wheels. Mounted on 3″ double-locking casters, it’s easy to move when needed. I constructed it from 3/4″ Baltic birch plywood with 100lb full-extension drawer slides for durability. The top surface is melamine-covered particle board with solid maple trim, creating a maintenance-friendly surface that resists common shop grime.

Sanding Belt Storage
The belts for my 6×48 sander didn’t have a good home, and I wanted them to be handy enough that I’d switch them out as needed. A piece if plywood, a 2×2, and some lengths of 4″ PVC pipe, and I had a handy storage rack mounted to the ceiling above the sander.

Cabinet for Lathe Stand
My lathe came with a nice stand, but the area under the lathe was a lot of wasted space. I built a small cabinet that fit inside this space to give a nice organized place for my lathe accessories. Built from Baltic Birth plywood, with 100lb full extension drawer slides. Painted my standard light machine grey.

Saw Blade Drawer and Holders
Quality table saw blades are pretty expensive, so I wanted to make sure they were stored property. I built a cabinet to fit under the outfeed table on my Unisaw, and dedicated one drawer to blade storage. I made each blade holder from 1/4″ plywood, originally Baltic Birch, but later just basic underlayment plywood.

The center piece is to support the weight of the blade, and the two magnets are just there to keep it from falling off. The holes allow for easy removal of the blade from the holder. Originally I used a piece of 5/8″ hardwood dowel for the enter pin, but changed it to a 3D printed piece on later builds.

Air Nozzle Storage
My air hose reel is not conveniently located anywhere near a toolbox. To keep some commonly used nozzles handy, I made this storage rack from some angle iron and some cheap air couplers. The rack screws into the wall behind the garage door rail.

Drill Press Fixture Clamp Mount
My drill press table uses T-slots, and I wanted to keep my fixture clamps handy but out of the way in my constrained space. The fixture holder was made to be mounted on a wall, but there was no wall space handy. I picked up an inexpensive flat screen TV mount and added a piece of 16-gauge steel as reinforcement to stiffen the backing plate, which I was able to mount in the same manner as a TV.

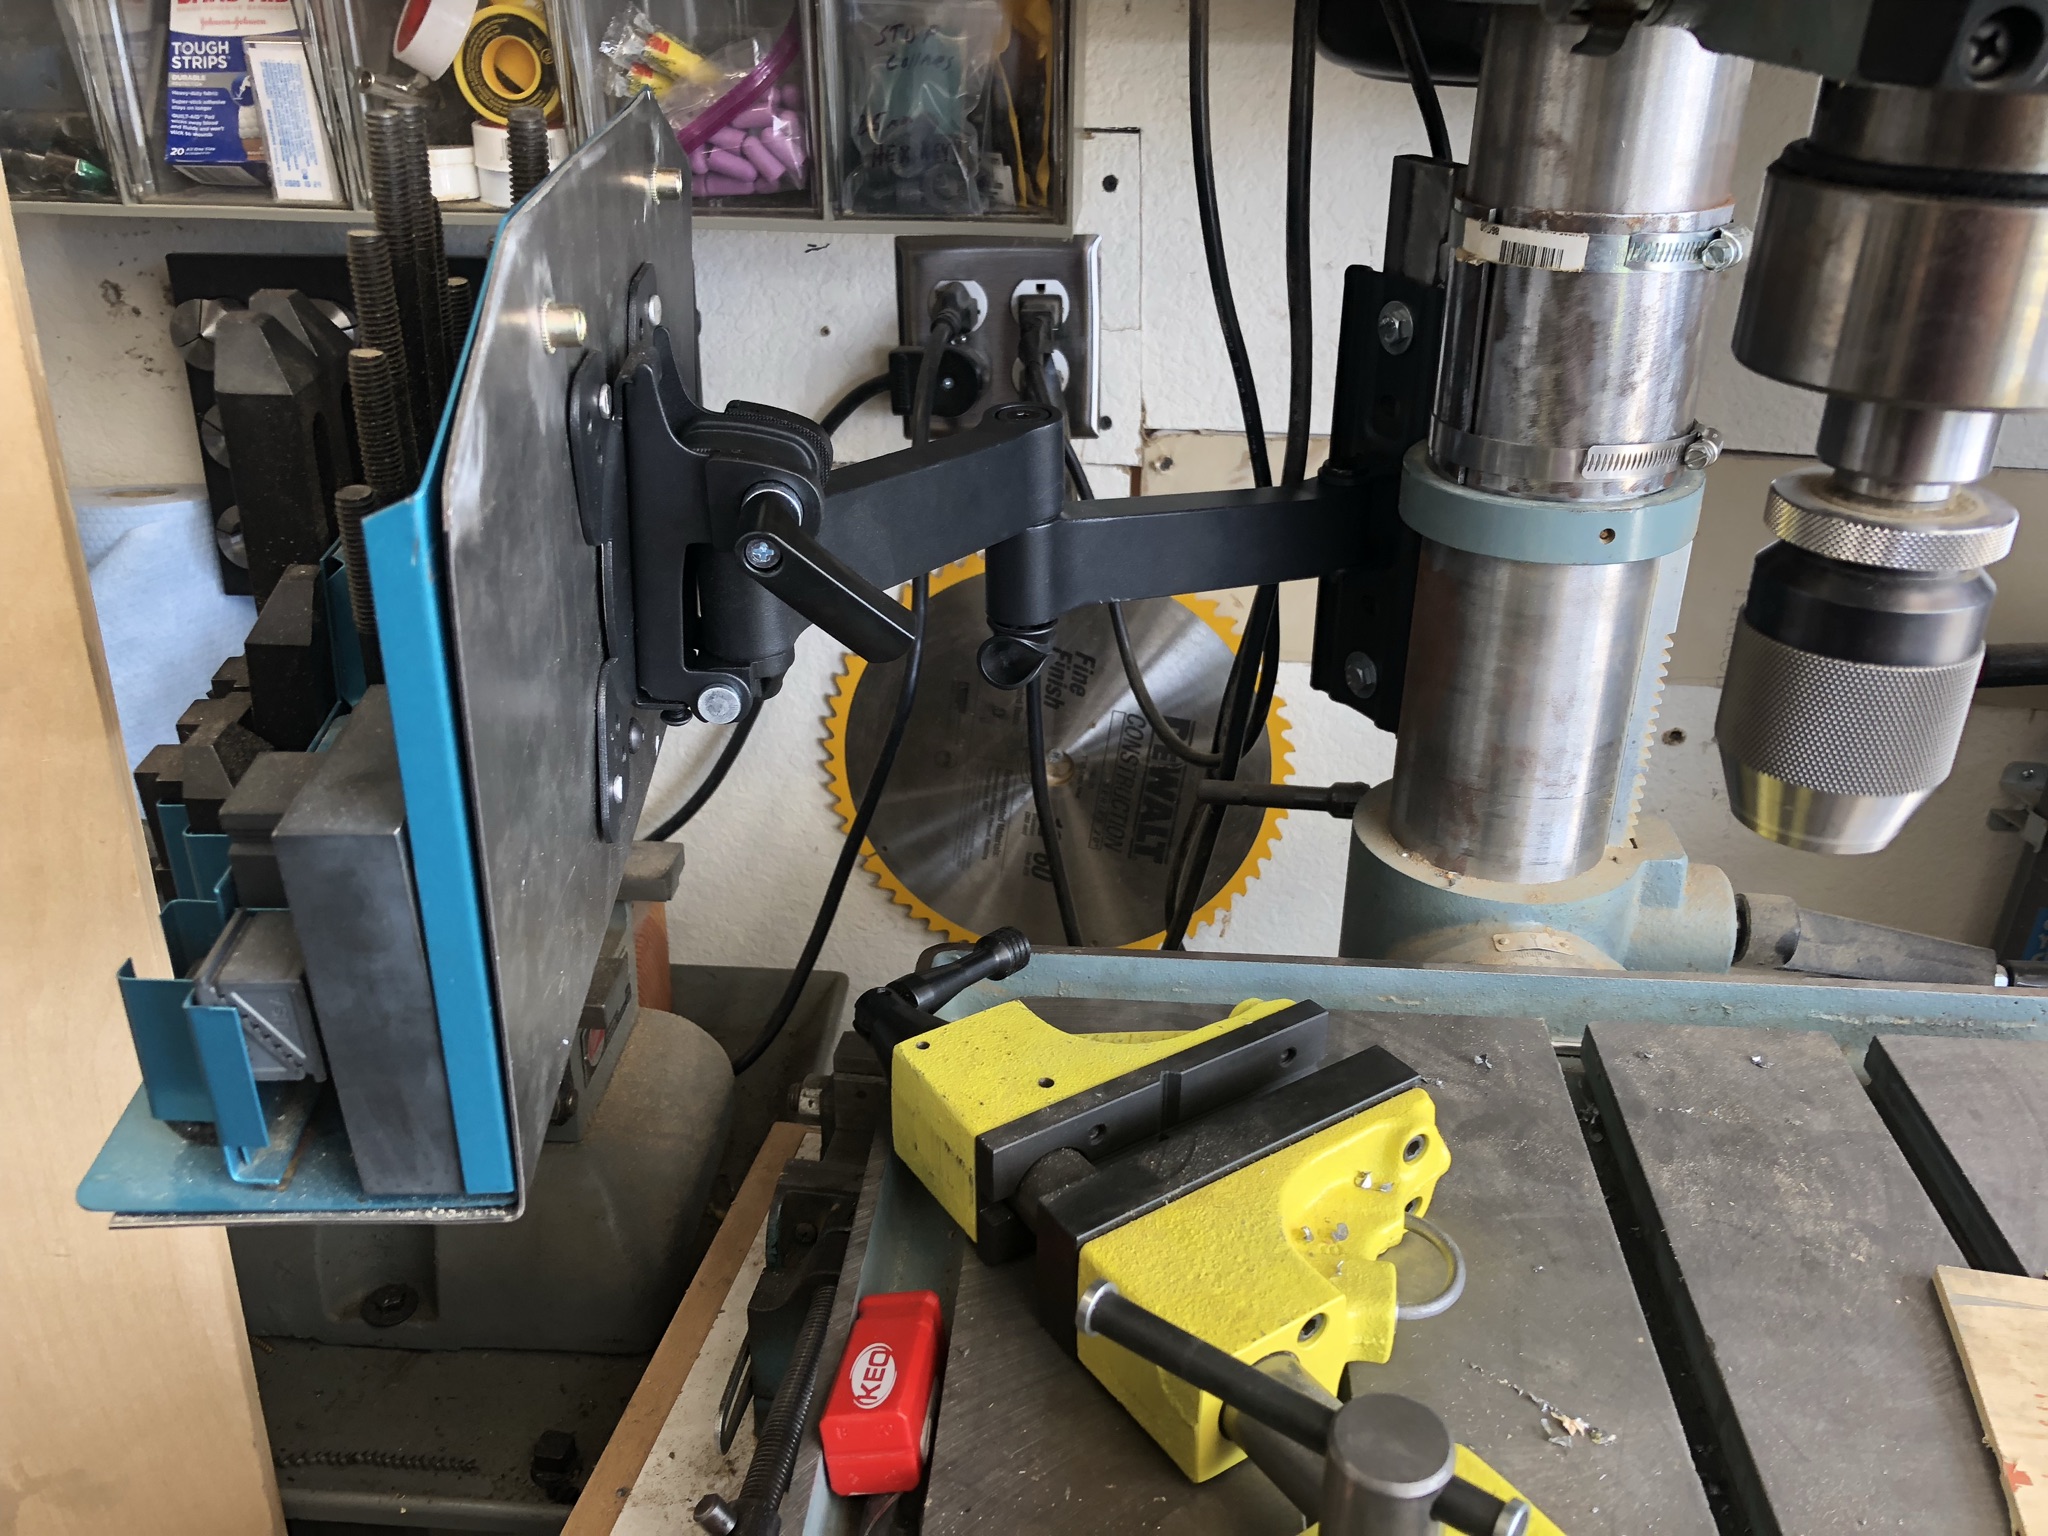
I didn’t want to make any permanent changes to my drill press, so I took some 1/8″ steel plate and formed it into two pieces with the radius of the outside of the column. On one piece, I welded a piece of steel to provide a place to bolt the “wall side” of the TV mount. These two pieces are wrapped around the column, then attached with large hose clamps.


This works great to keep the fixture clamps accessible when needed and out of the way when not.
Here’s the image from Fusion 360 without the drill press, and the drawing file itself.
